Recording Management (Beta)
Head over to the Recordings tab within your course, and you'll find new tools to manage your course videos. This beta feature lets you organise recordings into Modules, edit and trim clips, and more.
Recording Management Button
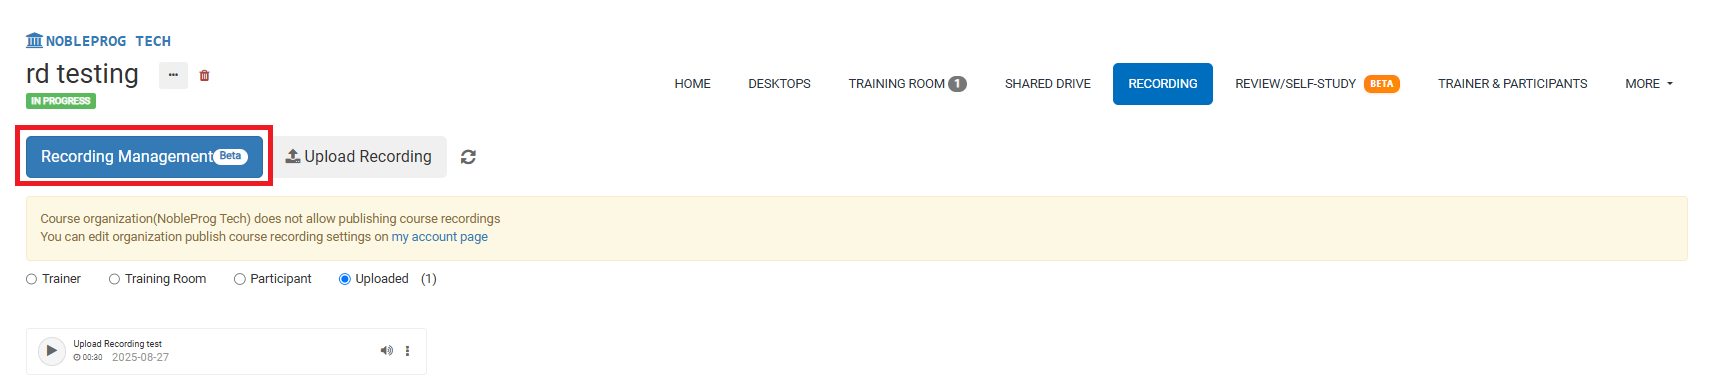
Within the Recordings tab, you'll spot a large blue button on the left labelled "Recording Management". As you create recordings throughout the course, they'll gather here, each tagged as Trainer, Training Room, or Participant.
If you've made recordings that aren't showing up yet, try clicking the refresh button next to the "Recording Management" button.
Clicking the button opens a new popup screen.
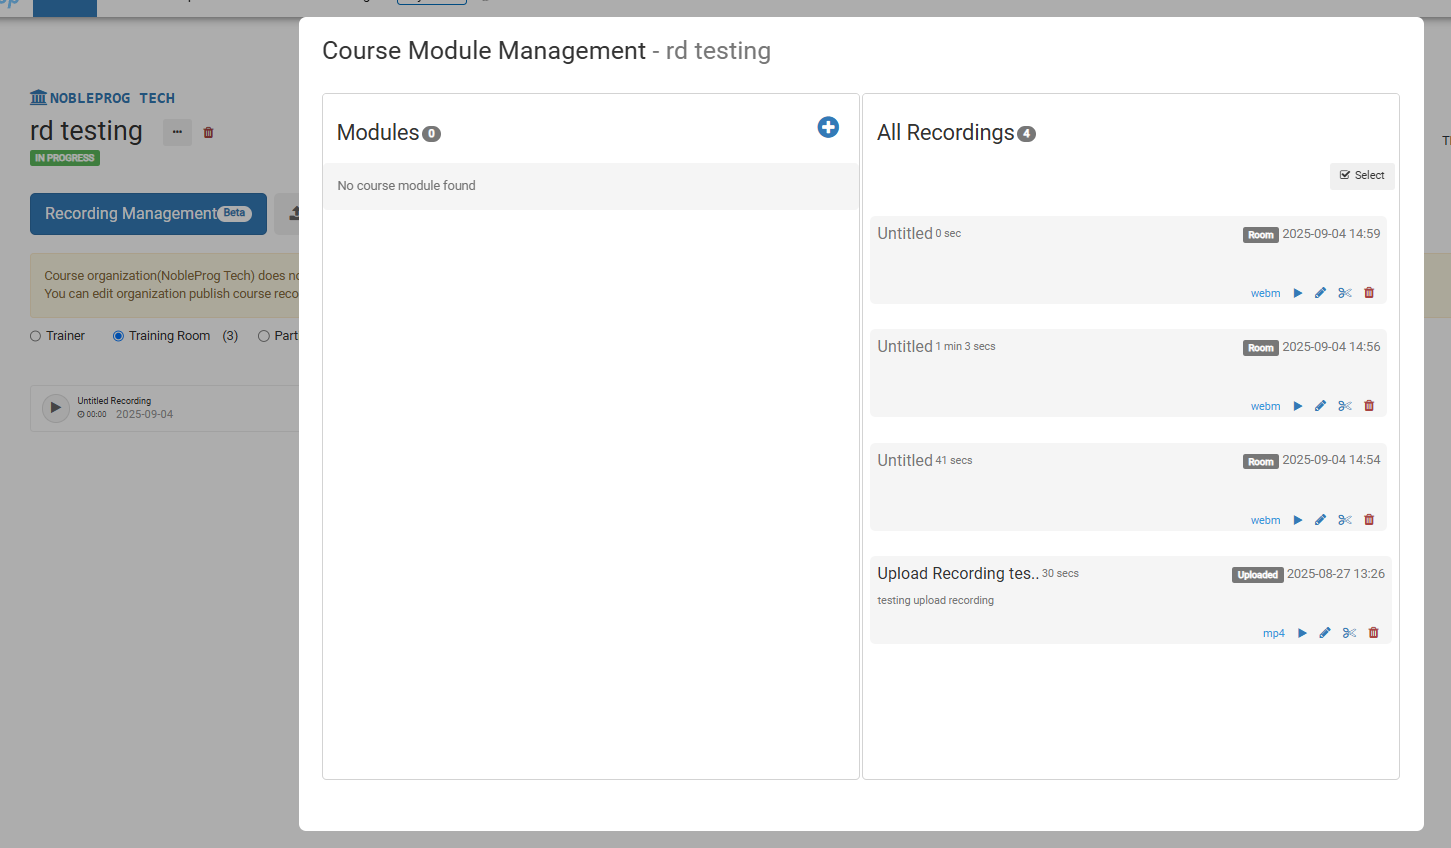
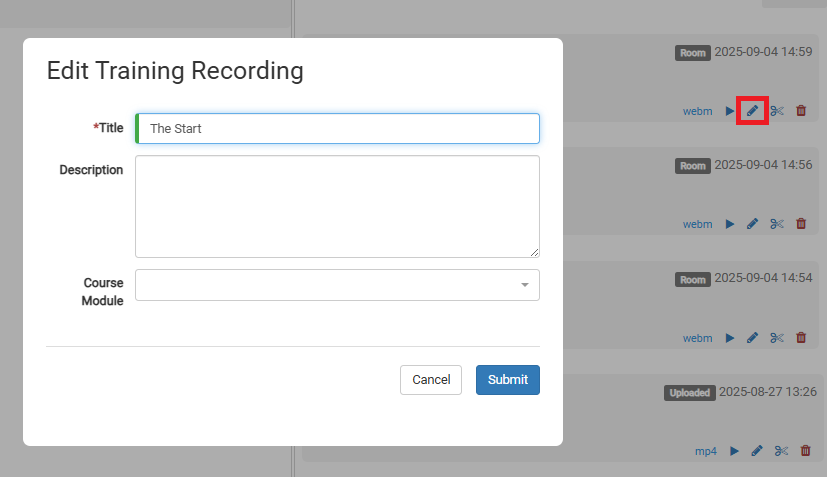
From here, you can edit any video by selecting the pencil icon on it.
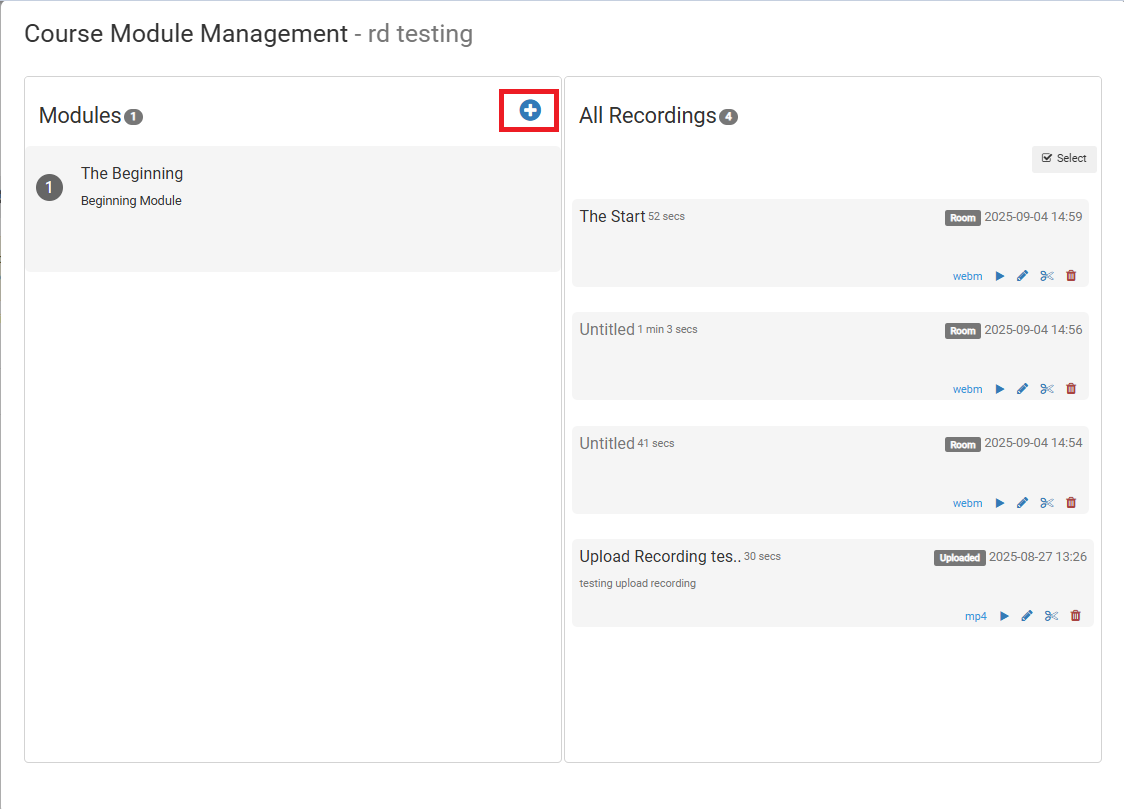
To create Modules, just click the (+) icon below the Modules box.
After setting up your modules, you can move videos into them. You can simply drag and drop them

or assign them manually while editing a video.

Video Editing
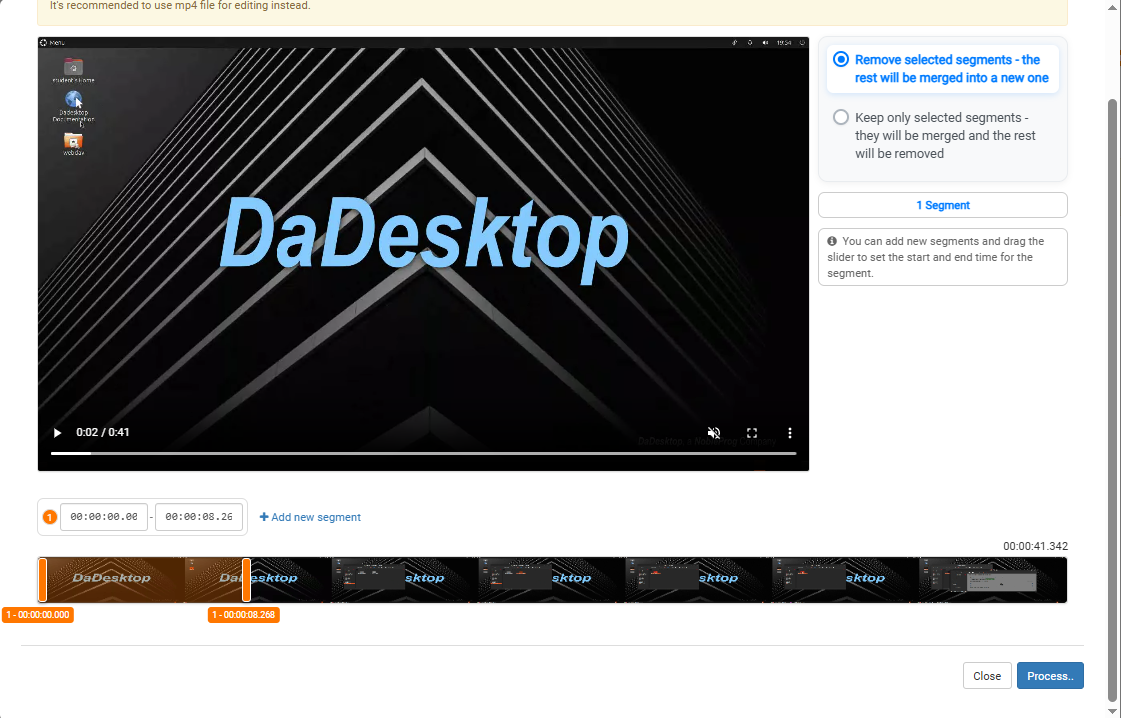
The platform also offers basic video trimming. If your recording contains idle moments or awkward pauses while you search for a file, you can cut these out. Simply click the "scissor" icon on the video to start editing out those sections.

This opens an Edit/Cut Recording window where you can scrub through and slice the video. Once you're satisfied, you can process the video to apply your cuts.